Romantic Rock Chick

any similarity
to another tutorial is strictly coincidental
please do not copy my work or claim as your own
supplies:
scrap kit : ftu romantic rock chick
made by me :o)
you can download the kit on my blog HERE
tube is PTU © Keith Garvey
you can purchase tubes HERE
filters:
xero / radience/porcelain/mistifier
Mura's meister / copies
Lets begin :o)
open a new raster layer 1000x1000
this is large but we will resize later
open a element from the kit
copy and paste onto your work area as a new layer
effects Mura's meister
with setting below

this is now your frame
open your tube (mine didn't have a close up so i made my own )
if you have a close up then add that and drag below your frame layer
if like me your have to make your tube much bigger
go to image /re-size and change to 120%
this should make your tube much bigger
move your tube layer where you like it
remove any of the tube showing around the frame layer
once you are satisfied with your tube you will see parts of the tube covered by the frame layer
making sure the tube layer is active go to selections/select all/selections/float/selections/defloat
you will now see marching ants around your tube layer
i erased the parts from the frame layer only where i wanted the tube to show as shown below

as you can see i left the marching ants on so you could see how i deleted the frame where i wanted it
once you have erased the area you want your tube to show through
duplicate your tube layer , on original tube layer make it highlighted
effects /xero / porcelain with the settings below

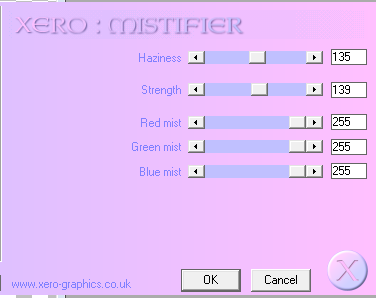
on your copy layer effects/plug in /xero/mistifier with settings below

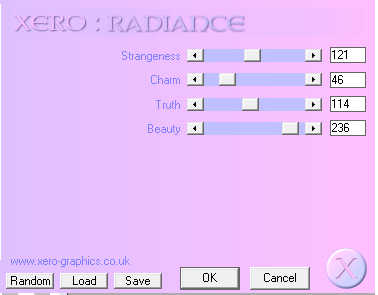
staying with copy tube layer
effects/plugins/xero/radience with settings below

on your copy tube lower the opacity with the slide bar to 40%
go to the scrap kit you are using and choose a few elements that you like
( remember its not set in stone you can add as many as you like)
once you have copy and pasted and placed your elements where you want them
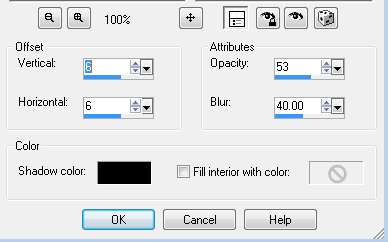
add a drop shadow to all of the elements as shown below

now add your artist url and copyright and if you need one for your tube your licence number
make sure you place it where it wont detract from the tag but is clearly seen
find a nice font and type your name
add the same drop shadow (i did mine twice)
and then layers merge /merge visible
save as a png if you don't want a background or a jpg if you don't mind a background
that's it your done
hope you enjoyed this tutorial :o)
~~~~~~~~~~~~~~~~~~~~
Babe

any similarity
to another tutorial is strictly coincidental
please do not copy my work or claim as your own
supplies:
scrap kit : PTU Vintage valentine
by Kimmilicious Kreationz
you can purchase the kit HERE
tube is PTU © Keith Garvey
you can purchase tubes HERE
filters:
penta.com / color dot
xero / radience/porcelein/mistifier
let's get started :o)
to do this tag you will need a large work area for now
file/ new/raster layer
1000x1000
image canvas size
i know this is very large but we will resize at the end
open and find a nice paper from your kit
copy/paste as new layer
pre set shape find a nice shape that you like
foreground white background null
making the width 60 draw out your preset shape
layers convert to raster layer
selections /select all
selections/select float
selections /defloat
selections invert
highlight your paper layer
and hit delete on your keyboard
delete the preset shape layer and on your paper layer duplicate
effects/cut out with settings below
right click your cutout layer and merge/merge down
find a contrasting paper and paste below your frame layer you just made
you can either use the deform tool to fit it into the frame or use image resize
find two flowers from the kit and place them on the left of the frame
resize if needed ( i resized by 40%)
resizing each element place them where you most like them around the frame
once this is completed choose your tube and highlight the layer below your original shape layer
paste your tube
if needed then again resize i( i resized mine by 70%)
selections/ select all/ selections float/selections defloat
now highlight your frame layer and erase where it is covering the top of the tube
duplicate tube layer on original tube layer effects/plugins/xero / porcelein
using setting below

on copy tube layer effects/plugins/xero
mistifier with settings below
again on copy tube , effects plug ins / xero / radience with setting below
now on copy tube layer change opacity to 50%
now its complete add a shadow as shown below on each layer except the paper layer and copy tube layer
add your copyright and url of artist and licence number if you have one
layers merge /merge visible
duplicate merged layer
on original merged layer : image / resize/resize by 90%
on copy merged layer : image / resize/resize by 85%
on the original layer adjust/blur gaussian blur 21.00
effects /plugins/penta.com colourdot settings below
add your name and merge visible
resize by 75%
thats it your done hope you enjoyed this tutorial :o)
~~~~~~~~~~~~~
Christmas Card

This tutorial was written by me
any similarity
to another tutorial is strictly coincidental
please do not copy my work or claim as your own
supplies :
Scrap Kit Bello - Christmas Gold
by bello Scarto
at heartbeatz creationz
you can ppurchase the kit Here
the Tube i used is by
© Wenke Ruehl (Sirina's Box)
you can purchase the pack of tubes Here
or purchase them Here
let's get started :o)
to do this tag you will need a large work area for now
file/ new/raster layer
800 x800
image canvas size
change width too 1200
and height to 950
i know this is very large but we will resize at the end
open and find a nice paper from your kit
copy/paste as new layer
pre set shape find a nice shape that you like
foreground white background null
making the width 30 draw out your preset shape
layers convert to raster layer
selections /select all
selections/select float
selections /defloat
selections invert
highlight your paper layer
and hit delete on your keyboard
this will be your card frame
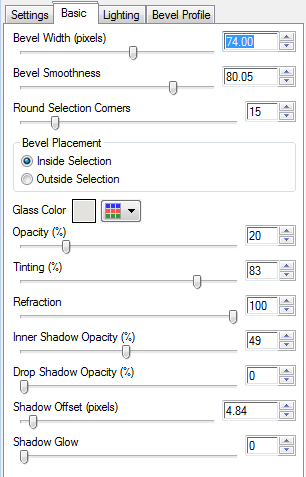
effects plug in eyecandy 5 impact/ glass
with settings below
open a new contrasting paper and copy paste as new layer
using your deform tool
resize the paper
at side and top and bottom
if any shows over the frame use your eraser
and carefully erase any of the paper showing
find two nice elements
and resize by 50 %
on your first element copy paste and put on the center top of your frame
duplicate the element twice and then drag under the first element
image rotate on first copy element 20% right
on second copy element image rotate 20% left
i used a paper bell and a Christmas bauble
see preview for placement
on top of the element copy paste your second element resizing to fit
add a drop shadow of your choice to all elements
layers merge /merge visible
duplicate your merged layer
drag your copy layer to the right of the original
using your deform tool
on the right layer
holding the ctrl button drag your right side of your frame up slightly
this makes it look like it is angled
duplicate this layer
image / mirror
find a nice colour for your txt and a christmassy font
on your left layer right a message
( i wrote from our house to your's on mine )
layers convert to raster layer
again use the deform tool and ctrl drag on left side of words slightly
so they look like they are angled also
add a drop shadow of choice to your text
layers merge merge down on left frame
repeat this again with another message on the right frame
changing instructions from left to right
in your centre frame add your tube
resize to fit
add a drop shadow of choice to make your tube stand out
you can now add a few more elements
until you like the way your tag looks
layers merge / merge visible
add your copyright and url of artist and your name
merge /merge visible
resize your tag work area to width 500
the height should automatically fit
duplicate your layer
on copy layer add a slight drop shadow
on your original adjust blur gaussian blur by 20
plug in penta.com /jeans
use default settings
merge /merge visible
save as png
and your done i hope you enjoyed this tutorial
Emo Beauty

this tutorial was written by me
any similarity
to another tutorial is strictly coincidental
please do not copy my work or claim as your own
supplies:
ptu kit Punk rock Fun
by Amy Marie
you can find her Here
you can purchase the kit Here
ptu tube by ©anna marine
you can purchase here
lets get started
open a new raster layer 900x900
(we will resize later )
open your tube
right click copy
paste into new work area
highlight bottom (empty) layer
open your scrap kit
and choose the elements you want
and frame if you wish to use one
open all in psp and minimise until needed
using your background element or frame
copy paste as new layer
i used an element but decided to put a paper behind it
(frame only )
find a nice contrasting paper
and drag below the frame
click inside the frame
selections select all
selections modify
expand by 12
selections /invert hit delete on your keyboard
(using large element )
if your element needs a background
choose a nice contrasting paper
copy paste as new layer
using erasure tool carefully erase any
of the paper you do not need
if you wish you can add another element inside
i used the wire effect from AmyMarie's kit
now find and place your element's
until you are satisfied with what you see
(see preview for idea's)
add a drop shadow to your tube and
any elements you wish to make stand out
layers /merge/merge visible
duplicate your merged layer
on copy layer
image resize by 85
on original layer
image /resize by 90
all layers unchecked
on original layer
adjust/blur /gaussian blur by 20
layers/merge/merge visible
layers/new raster layer
using a paper or flood fill with a contrasting colour
layers /load save mask
choose a mask that will enhance your image
click ok
in layer palette right click mask layer and merge/merge group
resize your mask layer by 80%
on mask layer
duplicate
x out your image layer
and on your first mask layer drag a little
up to the right
on copy mask layer
drag a little bottom left
add your copyright of artist and url
add your name
layers merge /merge visible
image resize choose pixel instead of percent
and make your image to the size you wish
all layers checked
that's it your done
hope you enjoyed this tutorial
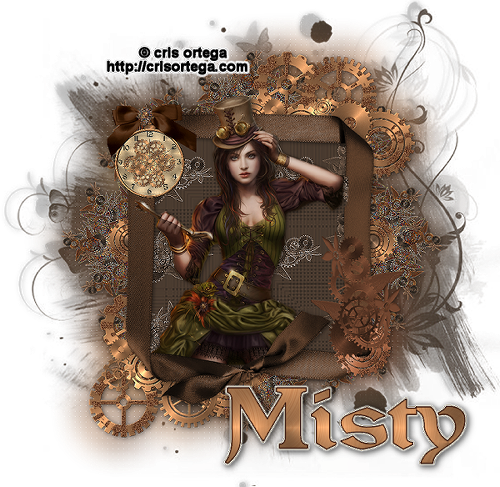
Steam Punk Princess
(beginner tutorial)
this tutorial was written by me
any similarity
to another tutorial
is strictly coincidental
i used the art work of
© Cris Ortega
you can view her work here
supplies :
tube of choice
font of choice
my scrap kit Here
steam punk mini
lets get started
open your kit and find your frame of choice from the kit
go back to your kit and choose a paper
open it and copy /paste as new layer into frame work area
drag below your frame layer
highlight your frame layer in your palette
using your magic wand tool
click inside your frame
selections/modify/expand by 8
selections / invert
highlight your paper layer
and hit delete on your keyboard
open your tube of choice and copy /paste as new layer
drag your tube layer below your frame layer
on your tube layer
selections /select all
selections/ float/select defloat
highlight your frame layer
and using your eraser tool erase any of the frame
hiding your tube at sides or top
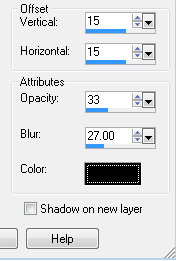
add a drop shadow of choice to your tube
using elements build up and around your frame
by copy paste as new layer
once you are happy with your elements and the way the tag looks
layers/merge/merge visible
duplicate your merged layer
on copy merged layer
image resize by 85%
on original layer
image /resize by 90%
on original layer go to adjust
blur/gaussian blur
put setting to 30
on copy layer
adjust sharpness/sharpen default setting
on copy layer put a drop shadow
of your choice
layers/merge /merge visible
add new raster layer
drag below merged layer
selections /select all
choose a paper or a dark colour from your tube
if paper paste into selection
if colour using paint pot tool fill
layers /load save mask
find a mask you like
and load it
layer palette
right click mask layer /merge group
layers/merge merge visible
add the copyright and name of artist for your tube
add artist url
add your name
add a drop shadow of choice
merge /merge visible
that's it your done
hope you enjoyed this tutorial
Steam Punk Christmas

This tutorial is mine
any similarities to another tutorial
are strictly coincidental
supplies :
scrap kit of choice
i used the generous freebie kit
from Heartbeat Creationz
you can find it HERE
tube of choice
mask of choice
filters:
eye candy 5 impact
glass
eye candy 400
gradient glow
penta.com
colour dot
lets get started
( this part for those using bello_ steam punk new year kit )
find a nice paper of choice
using your rectangle pre set shape
x out your forground /fill colour in colour palette
draw a rectangle to the size you need
this is to make a frame
layer palette convert to raster layer
selections /select all/selection flot/selection defloat
selections /invert
right click paper background layer / convert to raster layer
with paper layer hit delete on your keyboard
you can now delete the rectangle layer
selections /select none
effects plug in eyecandy impact / glass
with settings below

click ok
using some elements from your kit place them on the edge of the frame you just made
(see preview )
(for everyone )
open your tube and copy
paste as new layer in your frame working area
drag your tube below the frame layer
if the tube is way to large resize so that it fits inside the frame but the bottom nd top of tube are slightly hidden
on tube layer selections
select float
selections select defloat
highlight frame layer
and using erasure tool
erase the part of the frame where it hides the top of the tube only
add a drop shadow to your tube
as shown below
you can now add a few more elements to your tag if you wish
layers /merge visible
add a new raster layer
flood fill with a dark colour from your tube
layers load save mask
find your mask and load it
right click mask layer in layer palette and merge group
add new raster layer
flood fill with light colour from tube
and repeat above steps for mask
image rotate / free rotate 45 right
on your frame /tube layer
duplicate
on original layer
image resize 90%
on copy layer
image resize 85%
all layers unchecked
on original layer
adjust /blur /gaussian blur 30
effects penta.com /colour dot
with settings below

add your copyright and url of artist
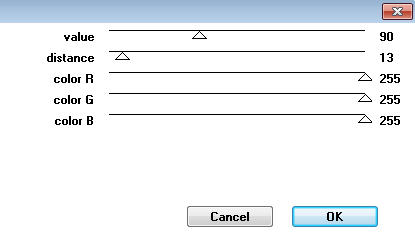
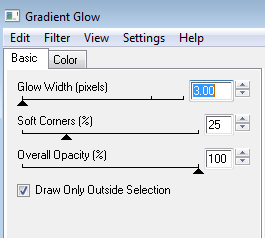
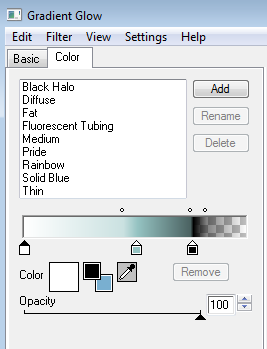
effects eyecandy 4000
gradient glow with settings below
add your name
again eyecandy 4000
gradient glow same settings
repeat last instruction again on your name
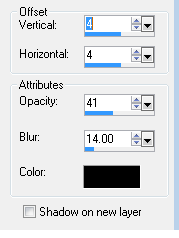
add a drop shadow as above
layers merge / merge visible
resize if you like smaller tags
and save as png
hope you liked this tutorial